
A Step-by-Step Guide to Creating a Custom GPT in ChatGPT


In this guide, I’ll walk you through exactly how to create a Custom GPT in ChatGPT, step by step.
Step 1: Make Sure You’re on a Paid ChatGPT Plan
To create a Custom GPT, you must be on a paid ChatGPT plan.
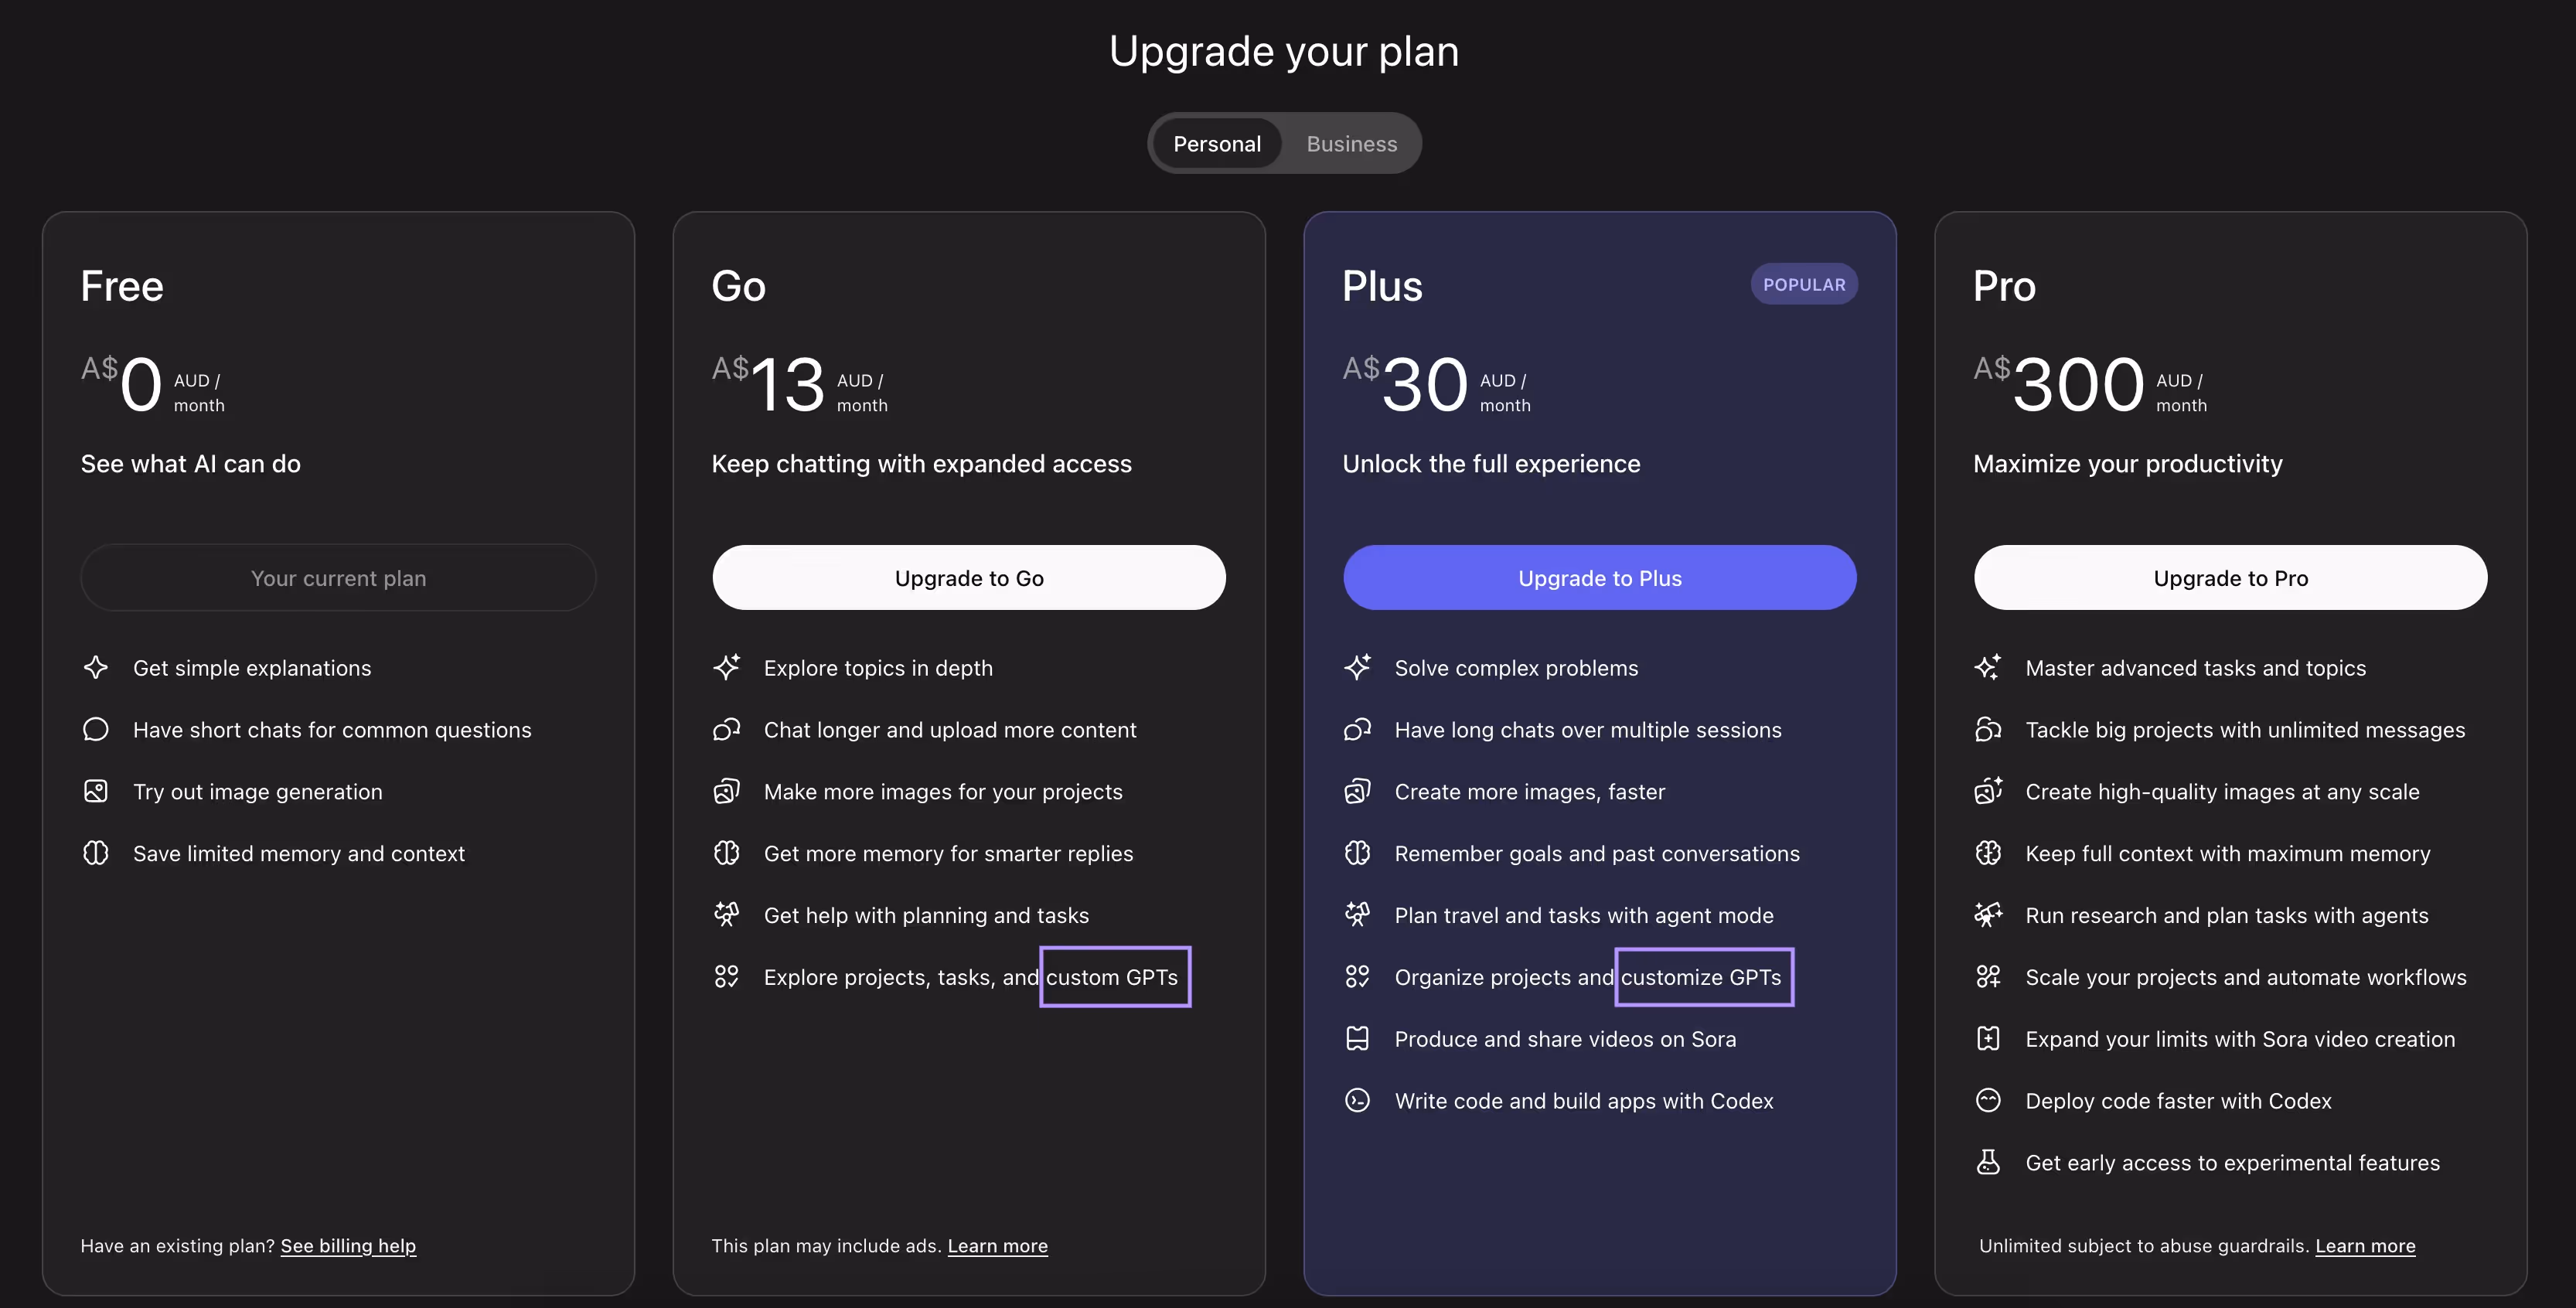
Custom GPT creation is not available on the Free plan.
You can create a Custom GPT if you’re on:
- Go plan
- Plus plan
- Business / Team plans
- Any higher-tier paid plan
Once you upgrade, the Custom GPT feature becomes available automatically.
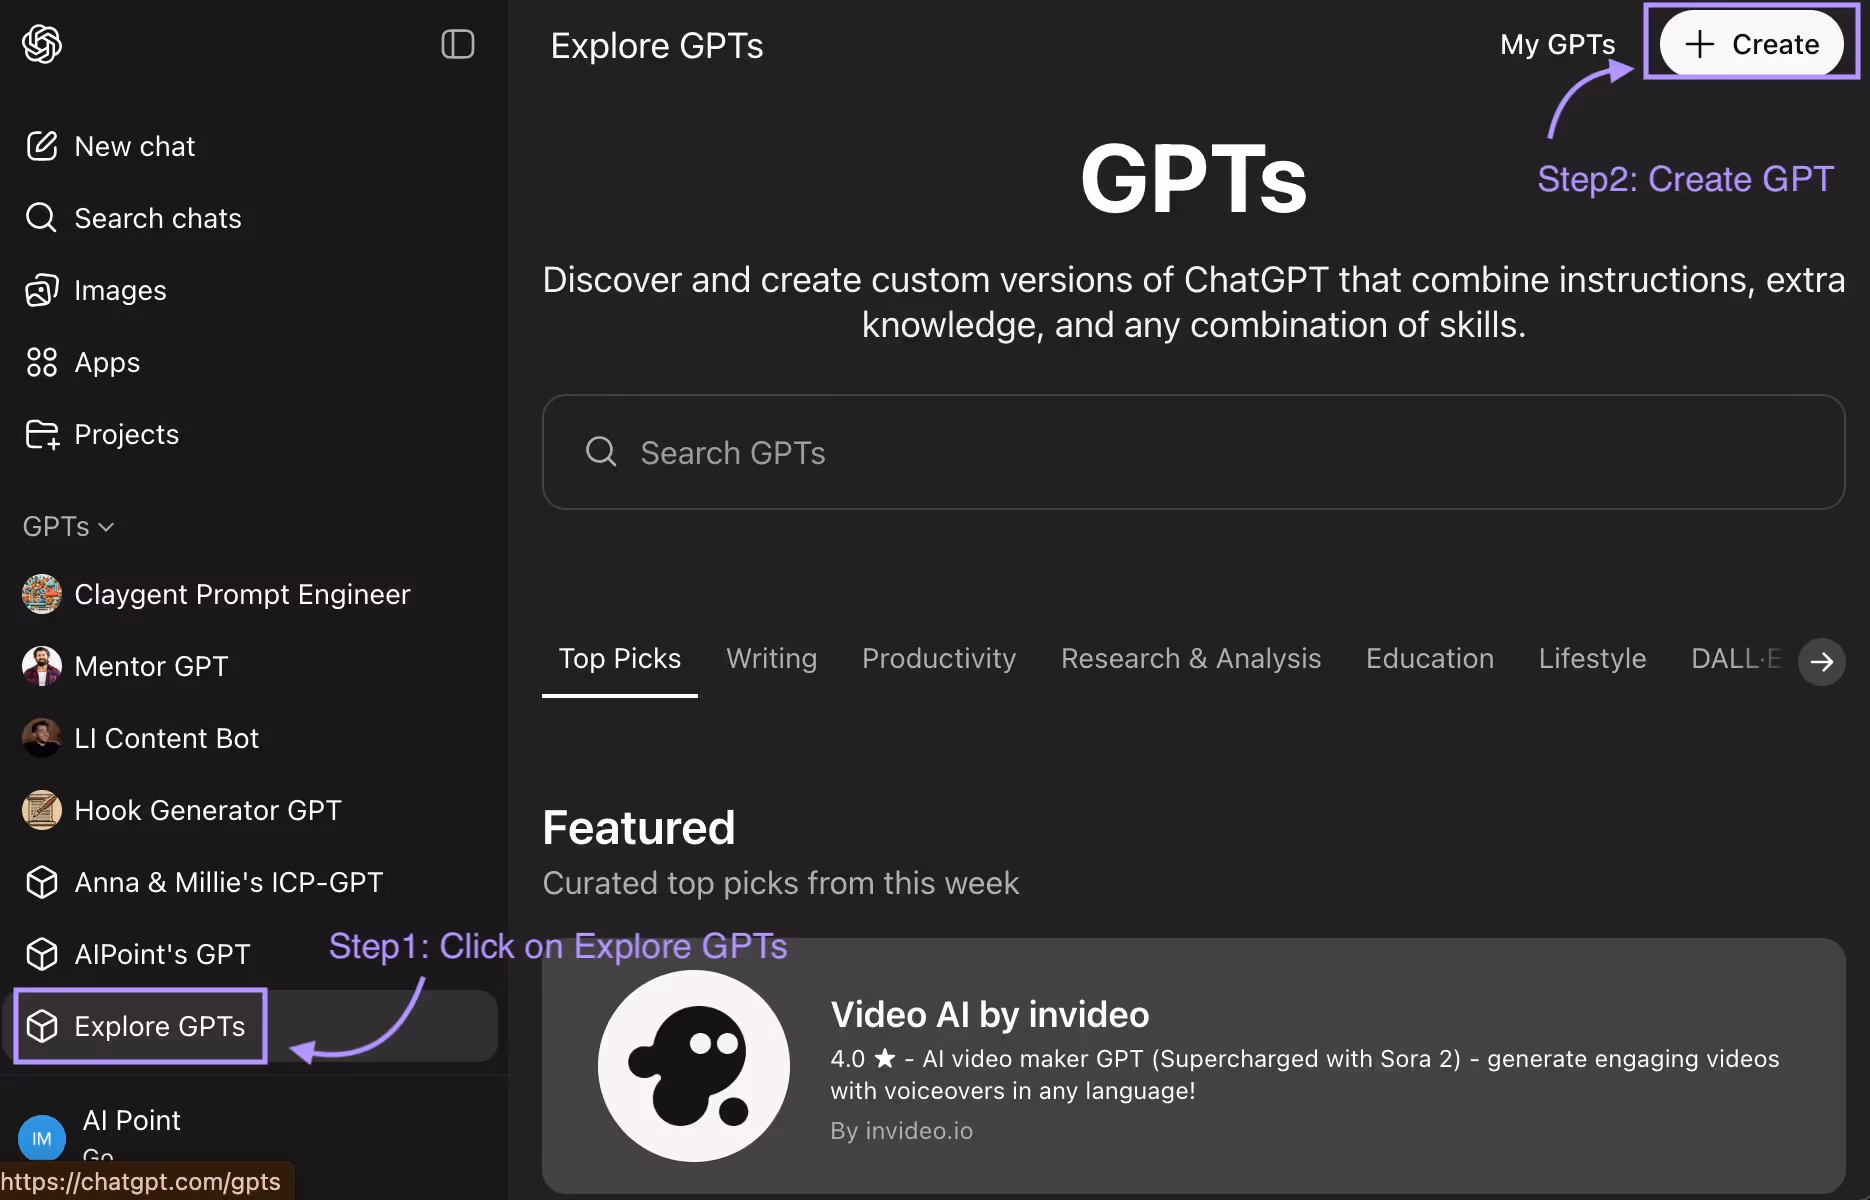
Step 2: Open “Explore GPTs”
After upgrading:
- Look at the left-hand sidebar
- Click Explore GPTs
This takes you to the GPT marketplace where:
- You can browse existing GPTs created by others
- Or create your own from scratch
Step 3: Click “Create” (Top Right)
On the Explore GPTs screen:
- Look at the top right-hand corner
- Click the Create button
This opens the Custom GPT builder.
Step 4: Understand the Purpose of a Custom GPT
Before configuring anything, it’s important to be clear on why you’re creating a GPT.
A Custom GPT is essentially a personalized assistant that:
- Follows specific instructions
- Uses your documents or knowledge
- Behaves consistently based on defined rules
You can build one for:
- Business use (sales, marketing, internal ops, support, training)
- Personal use (career assistant, resume helper, research assistant)
- Client-facing use cases
Step 5: Configure Basic GPT Information
Inside the Configuration section, you’ll define the basics:
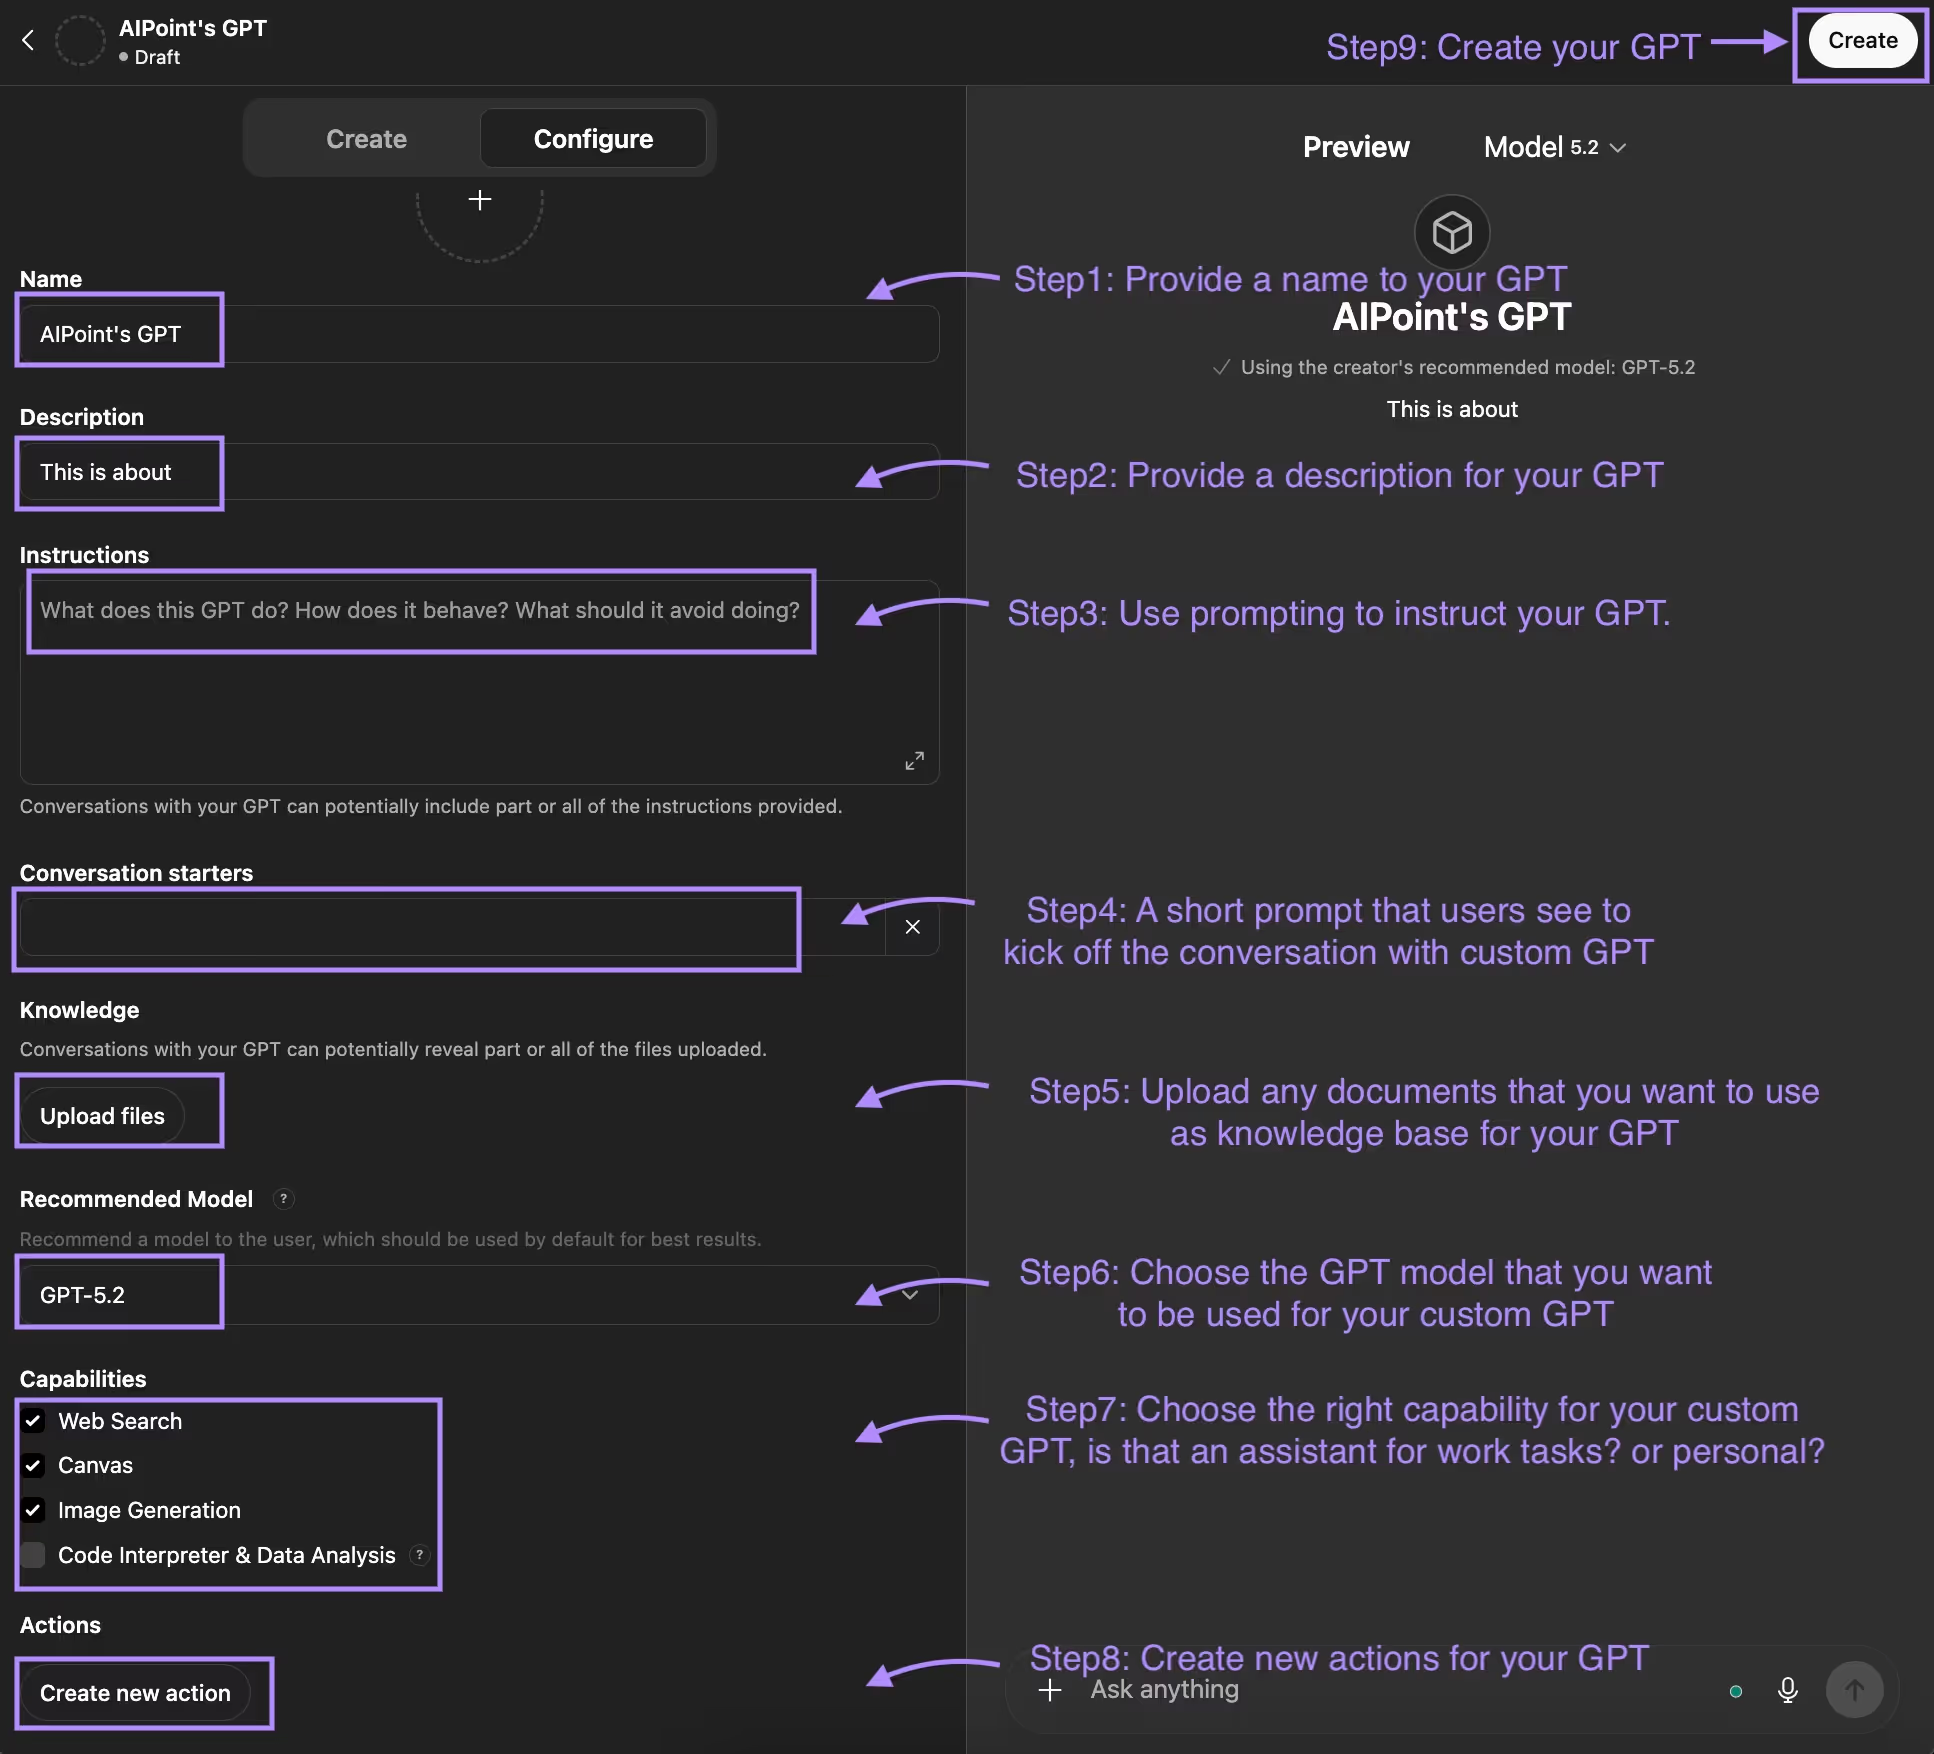
1. Name
Give your GPT a clear, descriptive name.
2. Description
Explain what your GPT does and who it’s for.
3. Instructions (Most Important Part)
This is where your prompting skills matter.
A strong instruction setup usually includes:
- Role – Who or what the GPT is
- Rules – Boundaries and constraints
- Tasks – What it should help with
- Examples – Sample inputs and outputs
- Output format – How responses should be structured
This ensures your Custom GPT behaves consistently and clearly understands how to interact with users.
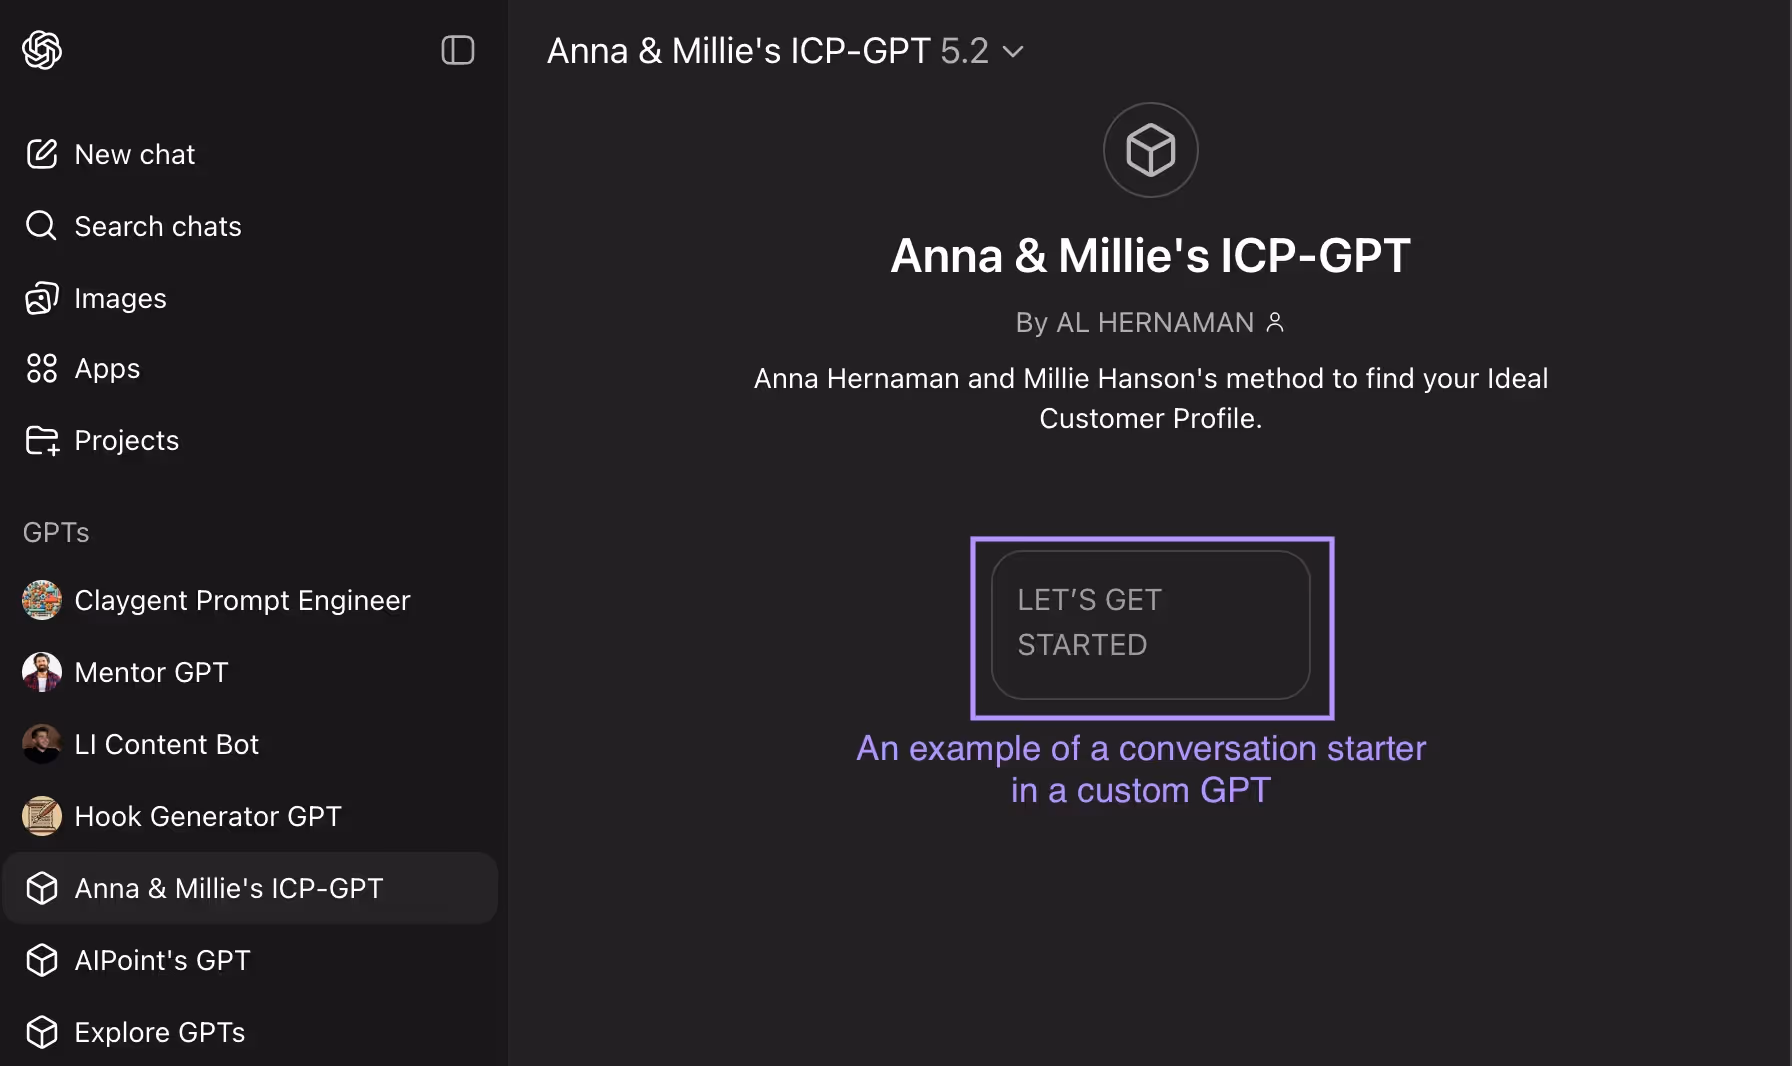
Step 6: Add Conversation Starters
Conversation starters are clickable prompts users see when they open your GPT.
They help users:
- Understand what the GPT can do
- Start a conversation instantly
Examples:
- “Help me create a sales email”
- “Summarize this document”
- “Generate ideas for my campaign”
Step 7: Upload Knowledge & Documents
You can upload files to give your GPT additional context.
Examples:
- Business documents
- SOPs
- Marketing assets
- Internal playbooks
- Resumes or personal documents
This is especially powerful for:
- Internal business assistants
- Training bots
- Knowledge-based GPTs
Step 8: Choose the GPT Model
Next, select which model your Custom GPT should use.
- ChatGPT will recommend a default model
- You can change it based on your needs (speed vs reasoning depth)
For most use cases, the recommended model works perfectly.
Step 9: Enable Capabilities
In the Capabilities section, you choose what your GPT can do:
Options include:
- Web search
- Canvas
- Image generation
- Code interpreter
- File analysis
Examples:
- Coding assistant → enable code interpreter
- Image assistant → enable image generation
- Text-only assistant → enable web search & canvas only
Choose only what your GPT actually needs.
Step 10: (Optional) Add Actions & APIs
If you want your GPT to interact with external systems, you can define Actions.
This allows your GPT to:
- Call APIs
- Fetch data from external tools
- Trigger workflows outside ChatGPT
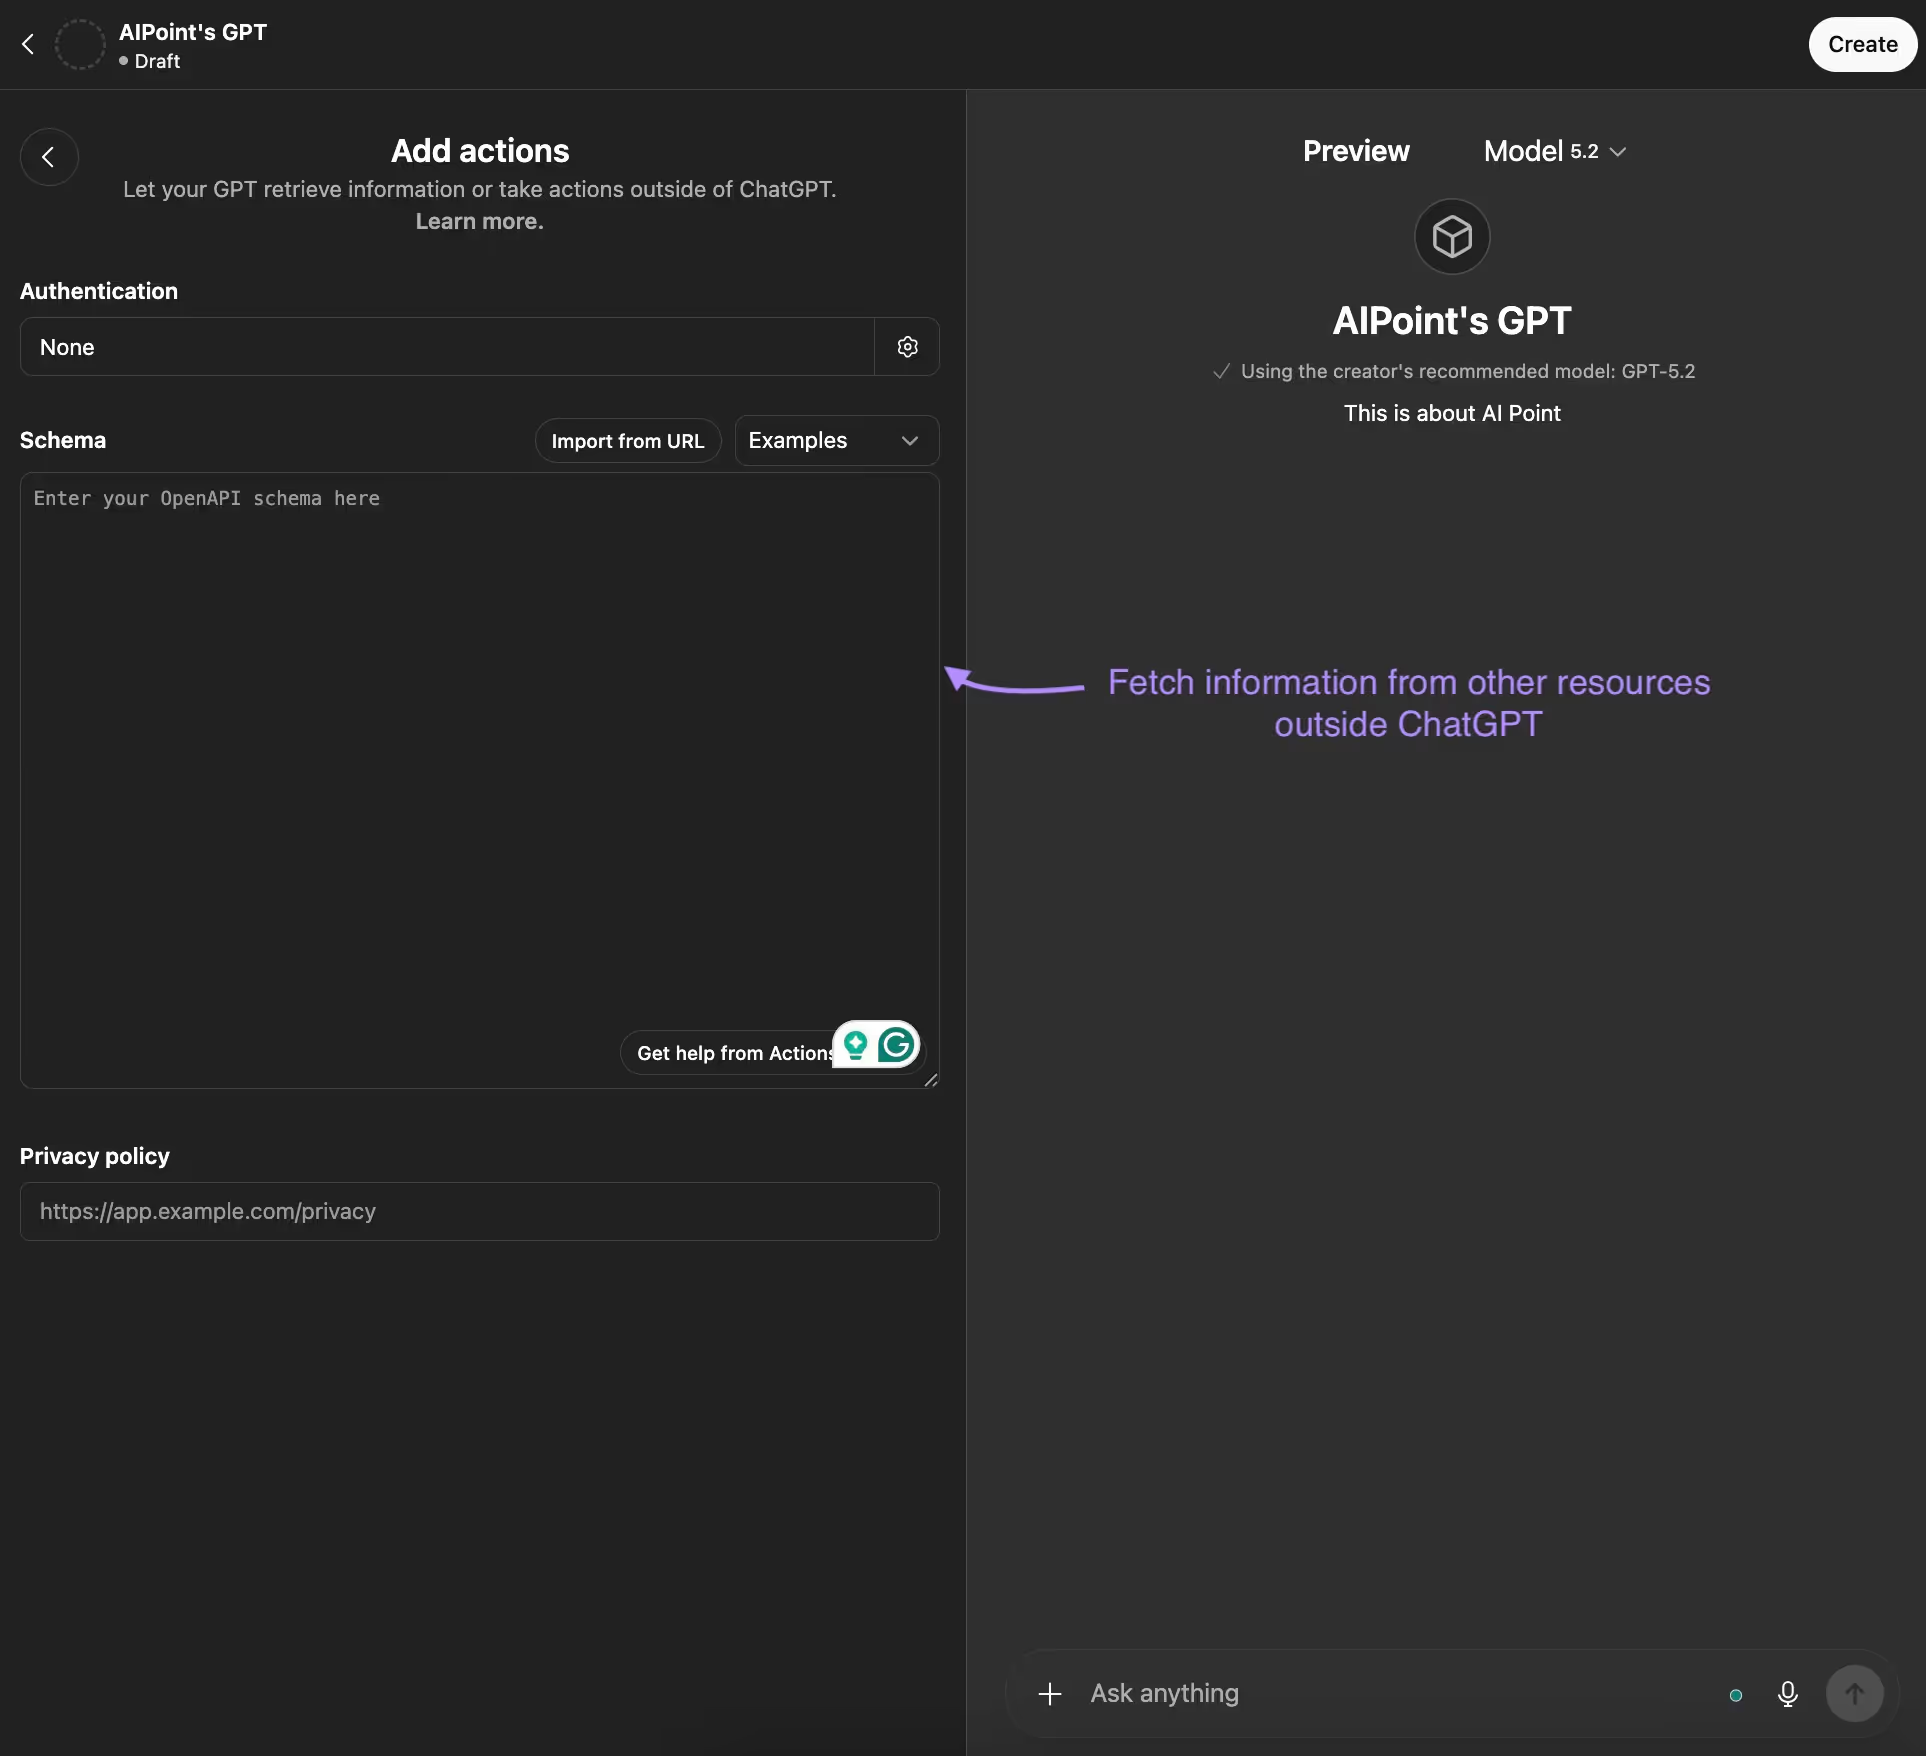
You’ll configure:
- Authentication method
- API endpoints
- Inputs and outputs
This step is optional and only needed for advanced use cases.
Step 11: Create & Share Your GPT
Once everything is ready:
- Click Create
- A popup appears asking how you want to share your GPT
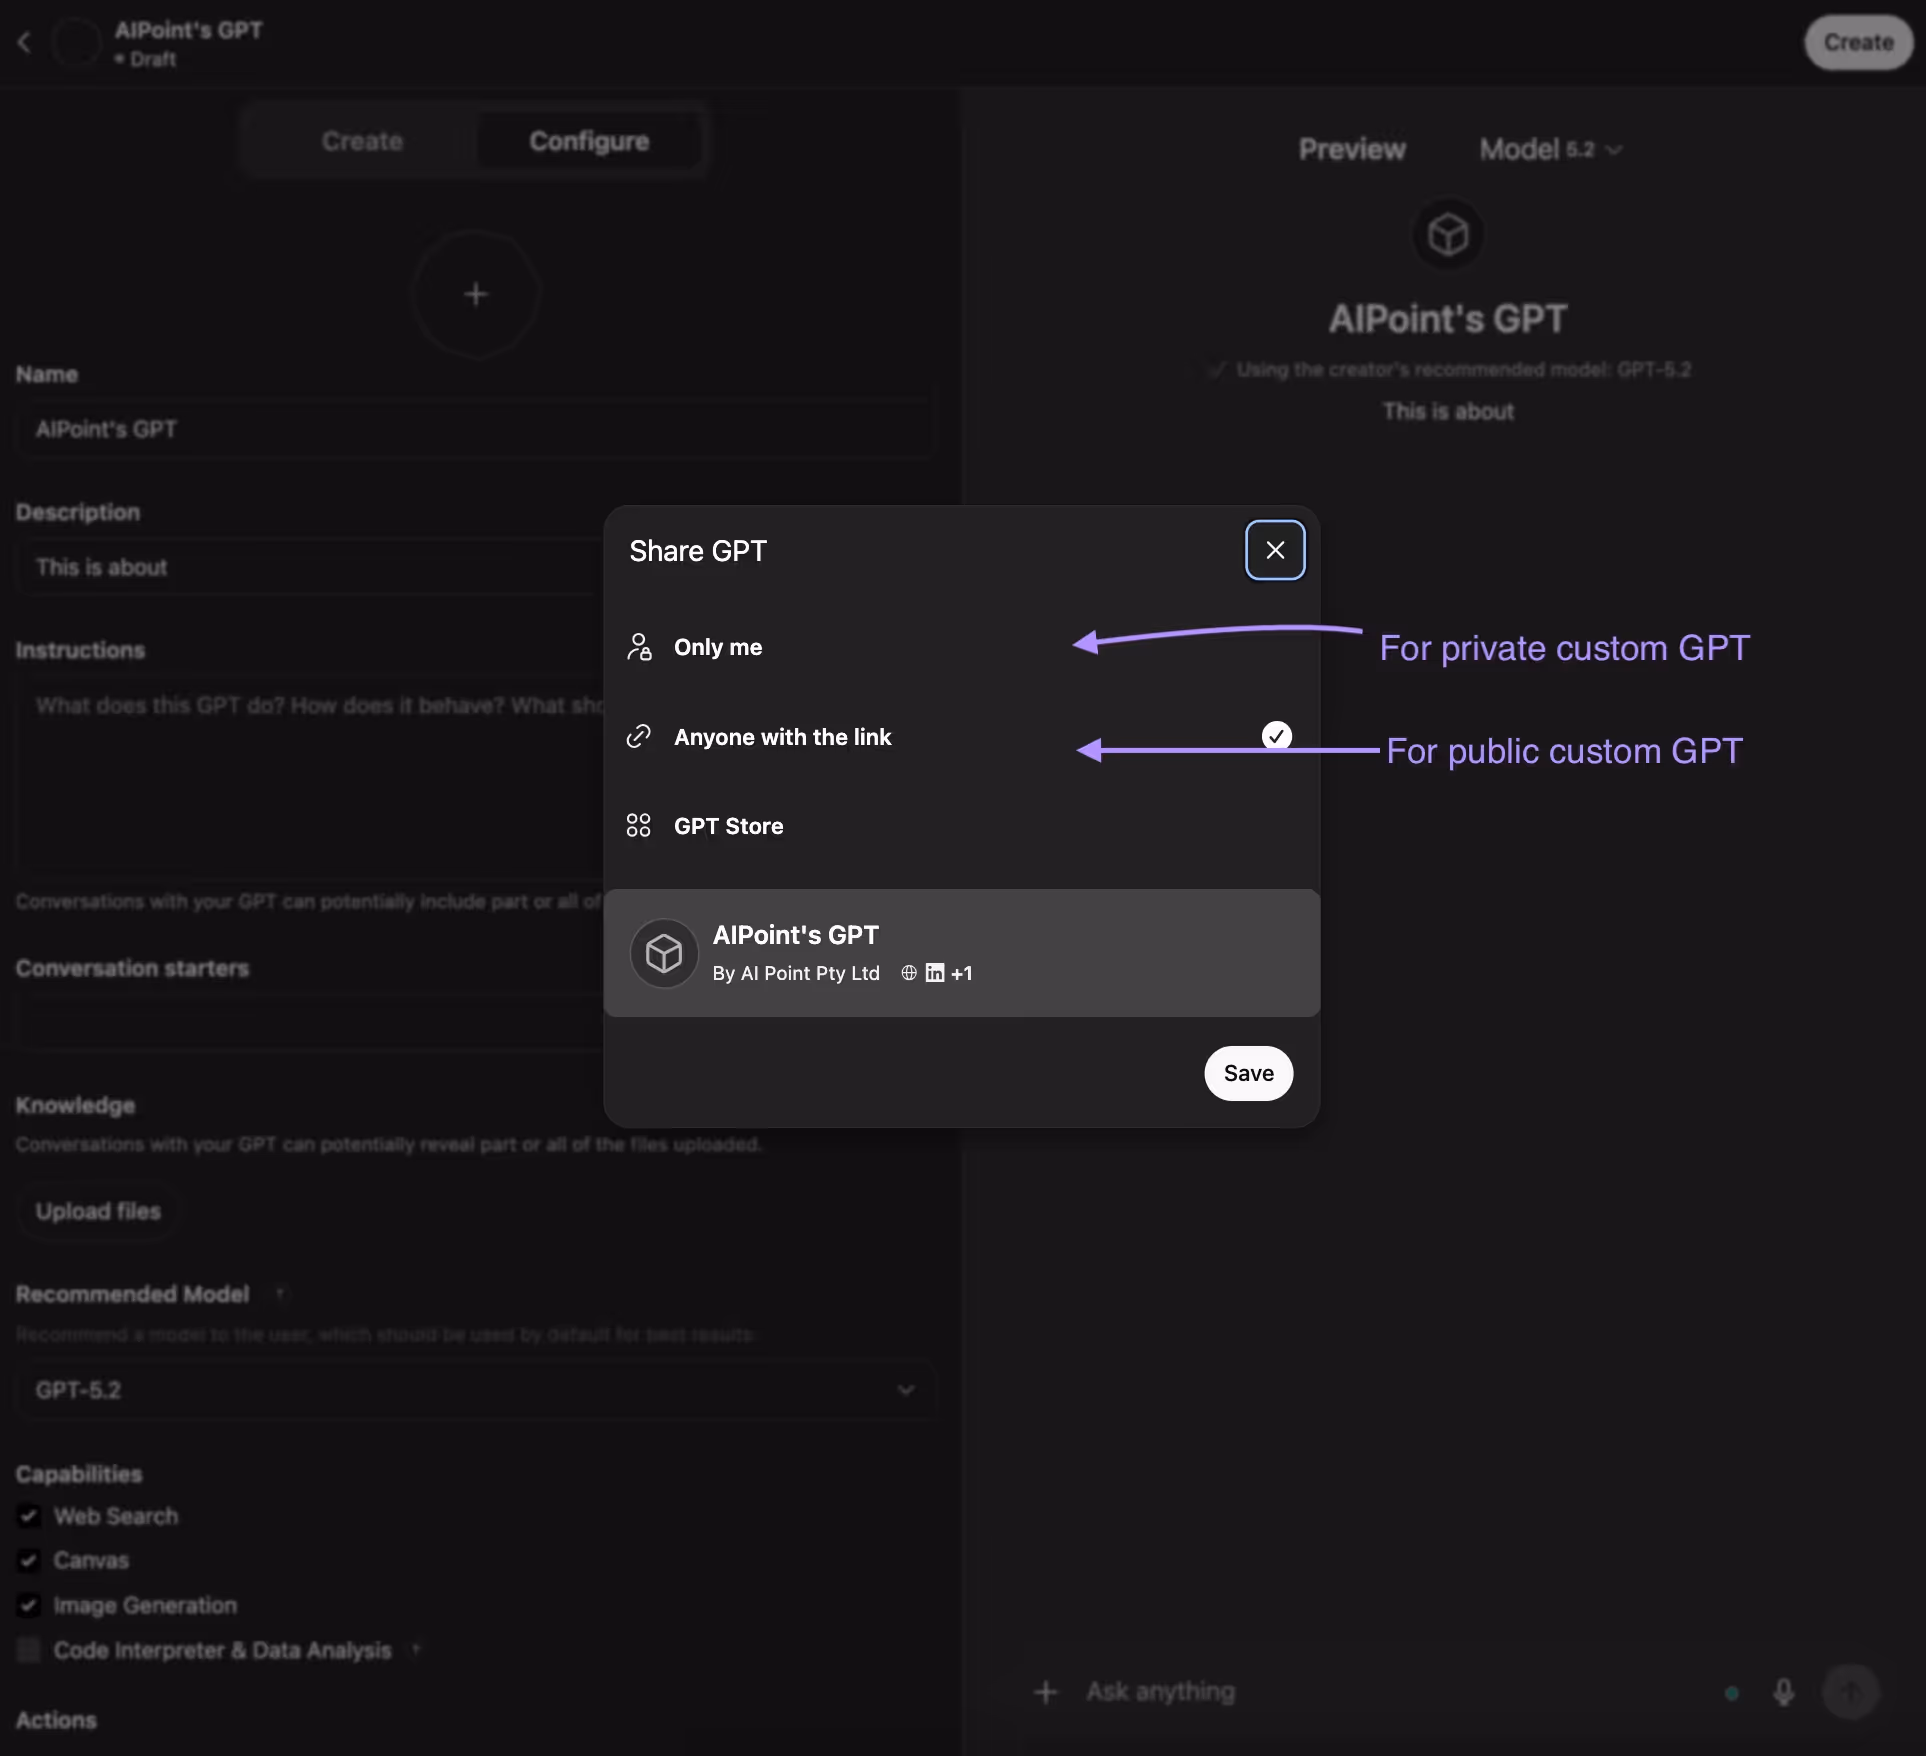
You can choose:
- Only me → Private GPT
- Anyone with the link → Public GPT
Click Save.
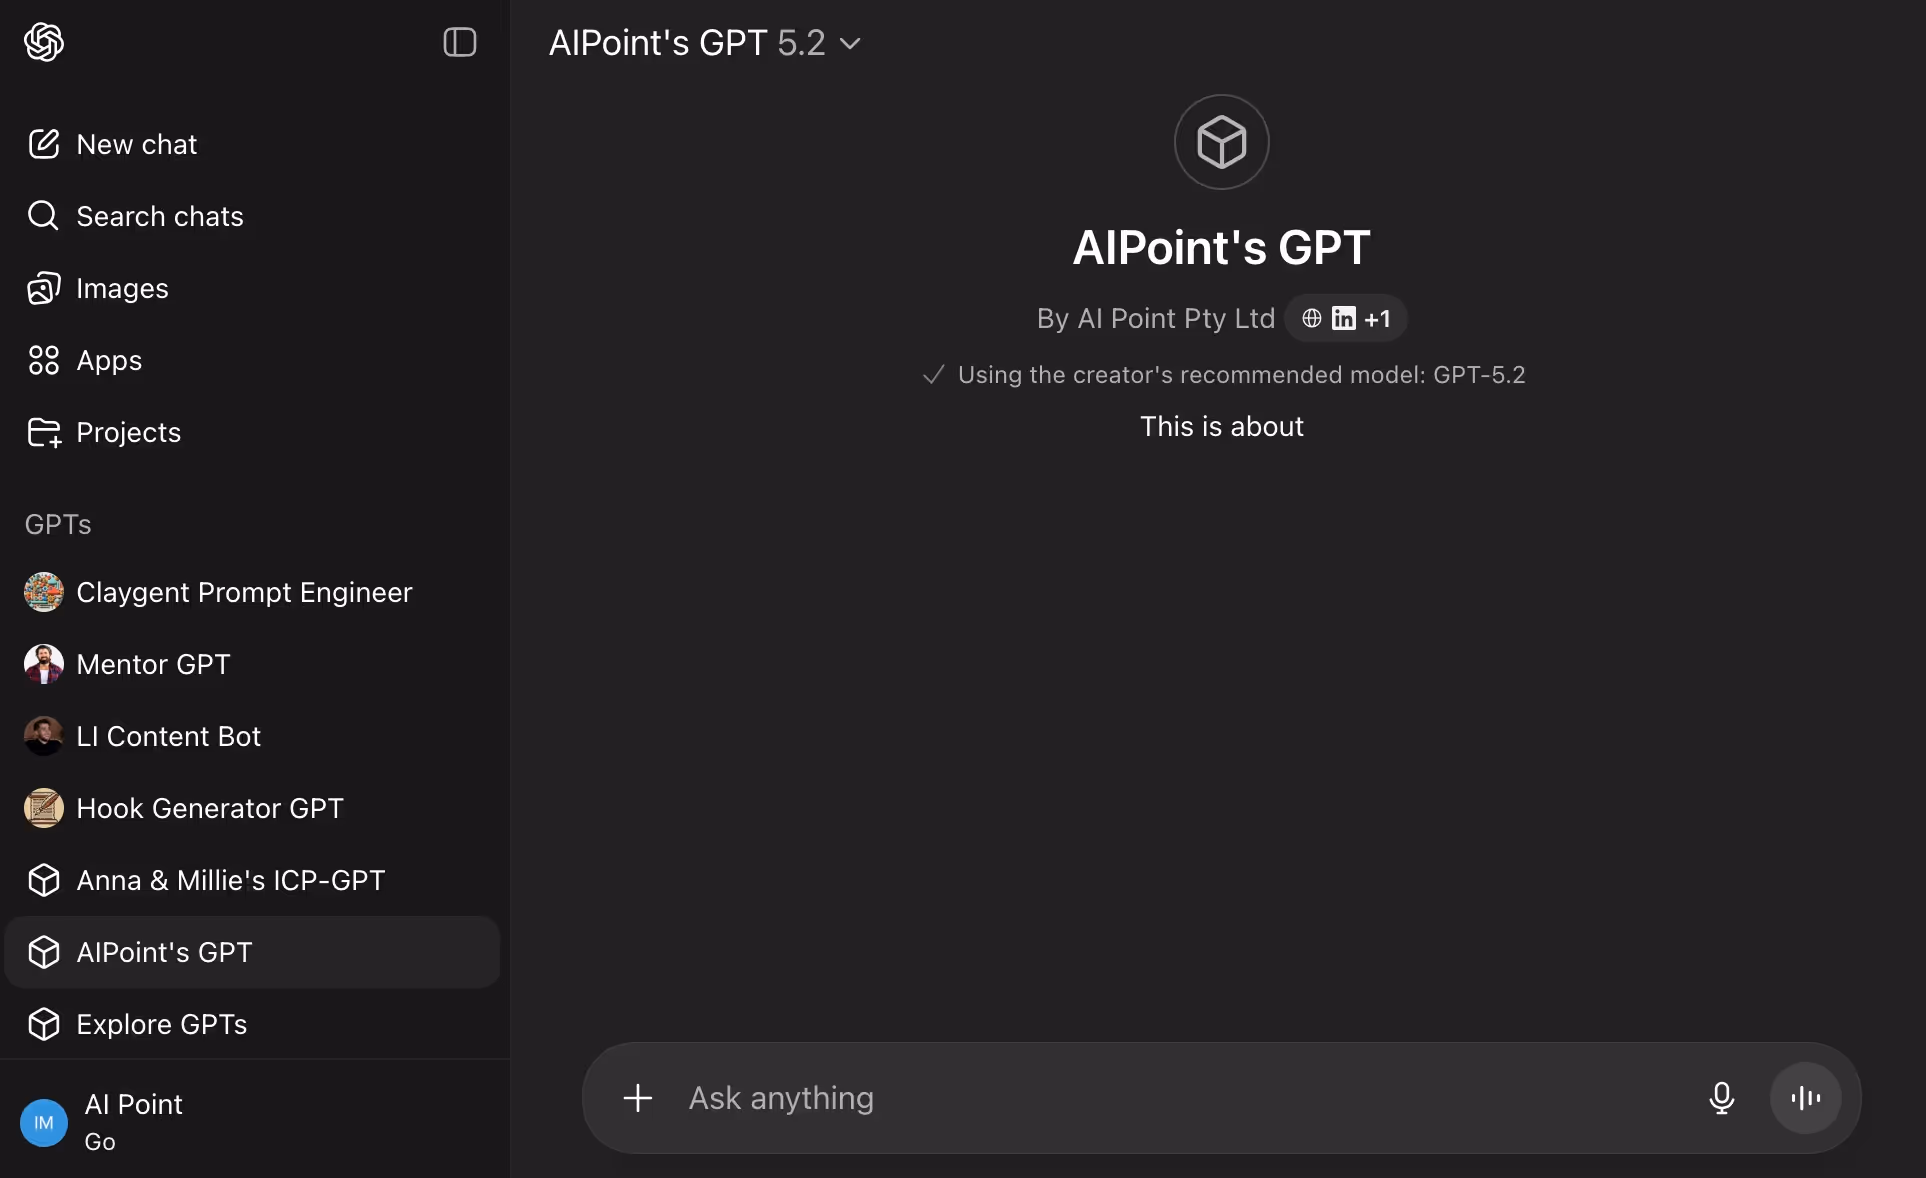
Step 12: Access & Share Your Custom GPT
After saving:
- Your Custom GPT appears on the left-hand sidebar under GPTs
- You can start chatting with it immediately
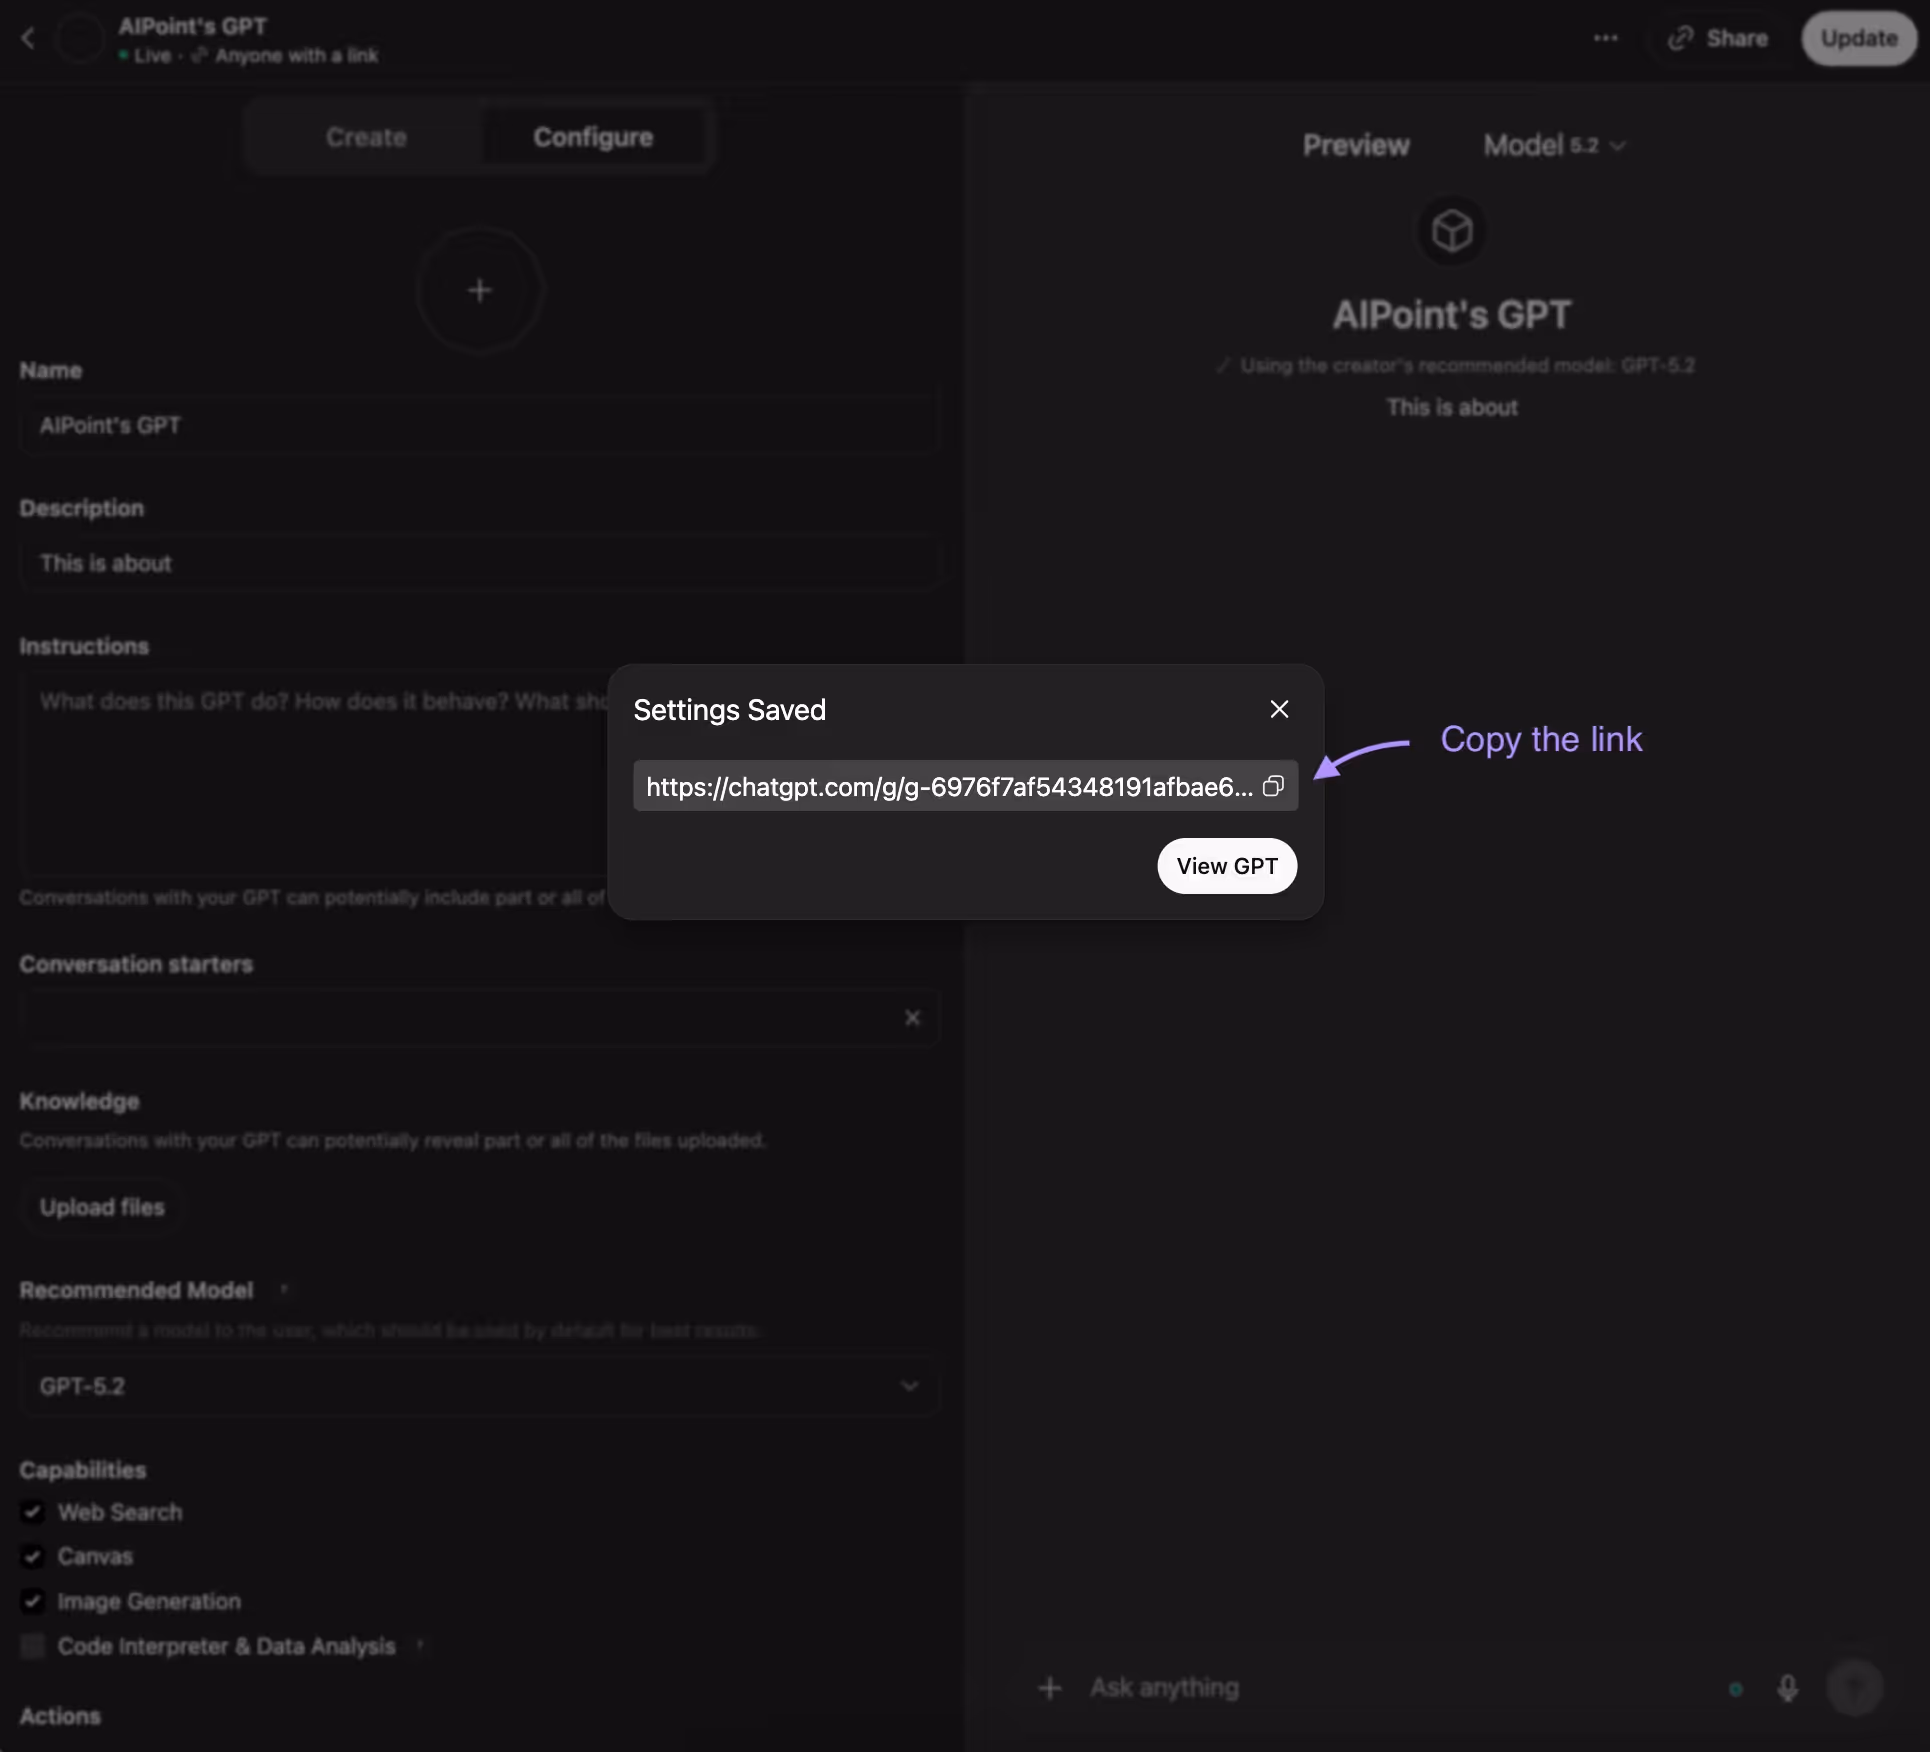
If it’s public:
- You’ll receive a shareable link
- You can send that link to anyone
Your Custom GPT is now live and ready to use.
Final Thoughts
Creating a Custom GPT is one of the most practical ways to turn ChatGPT into a real assistant tailored to your exact needs — whether for work or personal use.
If you found this guide helpful:
- Share it with someone exploring AI
- Check out our AI tools directory to discover useful tools
- Or get in touch if you’d like us to run an AI masterclass for your team
Thanks for reading, and happy building 🚀
Related Blog

Ready to Build
Your Pipeline?

